How To Use Archery Sight Tape

The TRUTH About Sight Tapes (You Could Be Making Them Wrong)


 For archers looking to improve their accuracy and precision, using an archery sight tape can make a world of difference. Whether you are a beginner or a seasoned pro, having the right sight tape can greatly enhance your shooting experience and help you hit your target with greater consistency.

Overview of archery sight tape and its importance

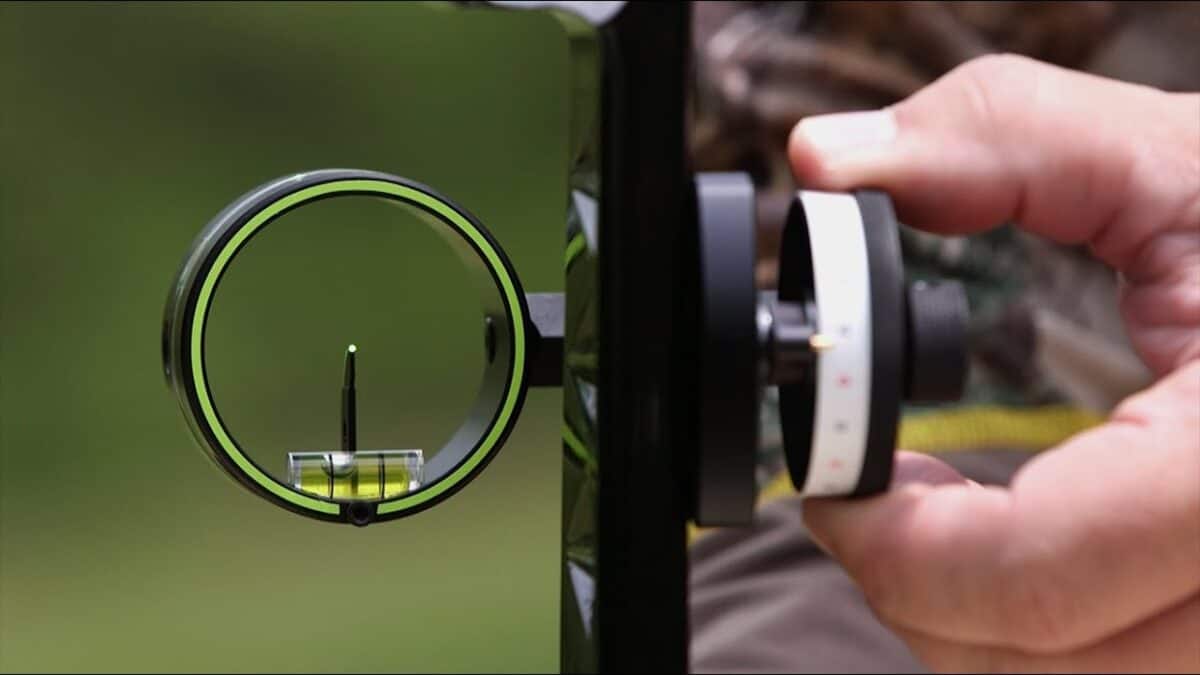
An archery sight tape is a thin adhesive strip that is applied to the sight housing of your bow. It is specifically designed to help you make accurate adjustments to your sight pins, allowing you to compensate for distance and windage variations.

By using the sight tape, you can easily determine the correct pin setting for each shot, taking into account the specific range and environmental factors. Using an archery sight tape is crucial for achieving consistent shots and maximizing your accuracy.

Without it, you would need to rely on guesswork or trial and error to make adjustments, which can be time-consuming and frustrating. The sight tape takes the guesswork out of the equation, allowing you to quickly and confidently adjust your sight for different distances.

Benefits of using archery sight tape for accuracy

Using an archery sight tape offers several key benefits for improving accuracy:

  1. Precise adjustments: The sight tape provides a precise and systematic way to adjust your sight pins, ensuring consistent and accurate shots.
  2. Timesaving: With the sight tape, you can quickly determine the correct pin setting for each distance, saving time and effort during practice sessions or competitions.
  3. Increased confidence: Knowing that your sight is properly calibrated gives you the confidence to focus on your shot execution, leading to improved performance.
  4. Enhanced consistency: By using the sight tape, you eliminate guesswork and ensure that your sight adjustments remain consistent and repeatable shot after shot.

In conclusion, using an archery sight tape is a valuable tool for any archer looking to improve their accuracy and consistency. It provides a systematic approach to sight adjustments and offers several benefits that can greatly enhance your shooting experience.

Understanding Sight Tapes

Sight tapes are markings or measurements on the sight housing that indicate different distances, helping you adjust your aim accordingly. Here’s a breakdown of how to make the most of this valuable tool.

Explanation of sight tape markings and measurements

Sight tapes typically include markings or numbers that correspond to yardage or distance. These tapes are attached to the sight housing and provide a reference point for aiming at different ranges.

The measurements may be in yards, meters, or a combination of both, depending on your preference. It’s essential to familiarize yourself with the markings and understand how they correlate to specific distances.

How to read and interpret sight tape scales accurately

Reading and interpreting sight tape scales accurately is crucial for precise aiming. Start by zeroing in your sight at a known distance, such as 20 yards. Then, shoot arrows at various distances while adjusting the sight accordingly.

Take note of the sight tape marking corresponding to each distance to create your own customized sight tape scale. Some archers prefer a logarithmic scale, where the tape is spaced closer together for shorter distances and gradually widens for longer ranges.

Regular practice and fine-tuning are essential to ensure optimal accuracy. Experimenting with different sight tape styles and adjusting according to individual shooting preferences can improve consistency and help you hit your target even at varying distances.

Mastering the use of sight tapes takes time and practice. Start by creating a sight tape customized to your shooting style and gradually refine it for optimal performance. With patience and dedication, you’ll enhance your archery skills and consistently hit your mark.

Step-by-Step Guide to Applying Sight Tape

Determining your bow’s specific sight tape requirements

Before applying sight tape to your archery sight, it is crucial to determine your bow’s specific requirements. Here’s how you can do it:

  1. Measure your arrow speed: Use a chronograph or consult your bow’s manufacturer to determine the speed at which your arrows travel. This information will help you select the appropriate sight tape.
  2. Calculate your sight marks: Based on your arrow speed and the distance you want your sight marks to cover, use a sight tape calculator to determine the corresponding yardage measurements for each mark.

Preparing the sight and applying the tape correctly

Now that you have determined the sight tape requirements, it’s time to prepare your bow sight and apply the tape accurately. Follow these steps:

  1. Clean the sight surface: Use a mild cleaner or rubbing alcohol to thoroughly clean the sight surface. This will ensure proper adhesion of the tape.
  2. Cut the tape: Cut the sight tape into the appropriate size for your sight’s dial or wheel. Make sure to use a sharp knife or scissors for clean, precise cuts.
  3. Apply the tape: Begin applying the tape from the starting point on the sight dial or wheel, aligning it carefully according to the yardage measurements. Press the tape firmly to ensure it sticks well.
  4. Smooth out any air bubbles: To ensure smooth, accurate operation, gently press and smooth out any air bubbles that may have formed under the tape.

By following these step-by-step instructions, you can effectively apply sight tape to your archery sight, allowing for more precise aiming and consistent shooting accuracy.

Fine-Tuning Your Archery Sight Tape

For archers looking to take their shooting accuracy to the next level, using an archery sight tape can greatly enhance their performance. With a few simple adjustments and testing, archers can fine-tune their sight tape to achieve optimal shooting results.

Adjusting sight tape settings for elevation and windage

  1. Elevation adjustment: Start by loosening the sight tape adjustment screws and align the pointer with the desired yardage. Tighten the screws to secure the setting. Repeat this process for each desired yardage.
  2. Windage adjustment: To make windage adjustments, locate the windage adjustment screws on your sight. Loosen the screws and move the sight housing left or right to make the necessary corrections. Secure the screws once the adjustment is made.

Testing and making necessary adjustments for optimal performance.

  1. Take test shots: Start by shooting at a known distance, such as 20 yards, and observe where the arrows hit in relation to the aiming point. Make note of any deviations.
  2. Make sight tape adjustments: Use the deviations observed in step 1 to determine if any adjustments are needed. If the arrows consistently hit above or below the aiming point, make small adjustments to the sight tape for elevation. Similarly, adjust for windage if the arrows consistently deviate to the left or right.
  3. Continue testing and fine-tuning: Repeat the test shots and adjustments until the arrows consistently hit the desired target. Take note of the final sight tape settings for future reference.

By following these steps, archers can effectively use their archery sight tape to fine-tune their shooting accuracy and achieve optimal performance. Remember to consistently practice and monitor your sight tape settings for ongoing improvement.

Tips and Tricks for Using Archery Sight Tape

If you’re an archery enthusiast looking to improve your accuracy, using archery sight tape can be a game-changer. These simple tools can help you adjust your sight pins for different distances, increasing your chances of hitting the target. To make the most out of archery sight tape, here are some tips and tricks to keep in mind.

Using additional tools or accessories to enhance accuracy.

  1. Bow Balancing: Making sure your bow is properly balanced can greatly affect your accuracy. Use a bow balance scale or similar tool to ensure the weight distribution is optimal.
  2. Stabilizers: Adding a stabilizer to your bow can help reduce vibration and improve stability. This can lead to more consistent shots and better overall accuracy.
  3. Release Aids: Using a release aid can provide a more consistent and controlled release of the arrow. This can help eliminate unnecessary movement and improve accuracy.

Common mistakes to avoid when using bow sight tape.

  1. Using Incorrect Measurements: One common mistake is using the wrong sight tape measurement. Make sure to select the appropriate tape for your specific sight and follow the manufacturer’s instructions for installation.
  2. Ignoring Environmental Factors: Wind speed, temperature, and lighting conditions can all affect your shot. Take these factors into account when using archery sight tape and make adjustments accordingly.
  3. Improper Sight Adjustment: It’s important to properly align your sight pins with the desired distance markers on the sight tape. Failing to do so can result in inaccurate shots.

By following these tips and avoiding common mistakes, you can make the most out of archery sight tape and improve your accuracy on the range or in the field. Check this out for tips on sighting in your bow.

1st, 2nd and 3rd axis on a bow sight

Thing A Week #14 | "Setting 1st, 2nd and 3rd Axis"


Having a properly set compound bow sight can make a world of difference in accuracy and precision. Understanding how to set the first, second, and third axis on your bow sight is crucial in ensuring consistent and reliable shot placement.

Explanation of the different axes and their functions on a bow sight.

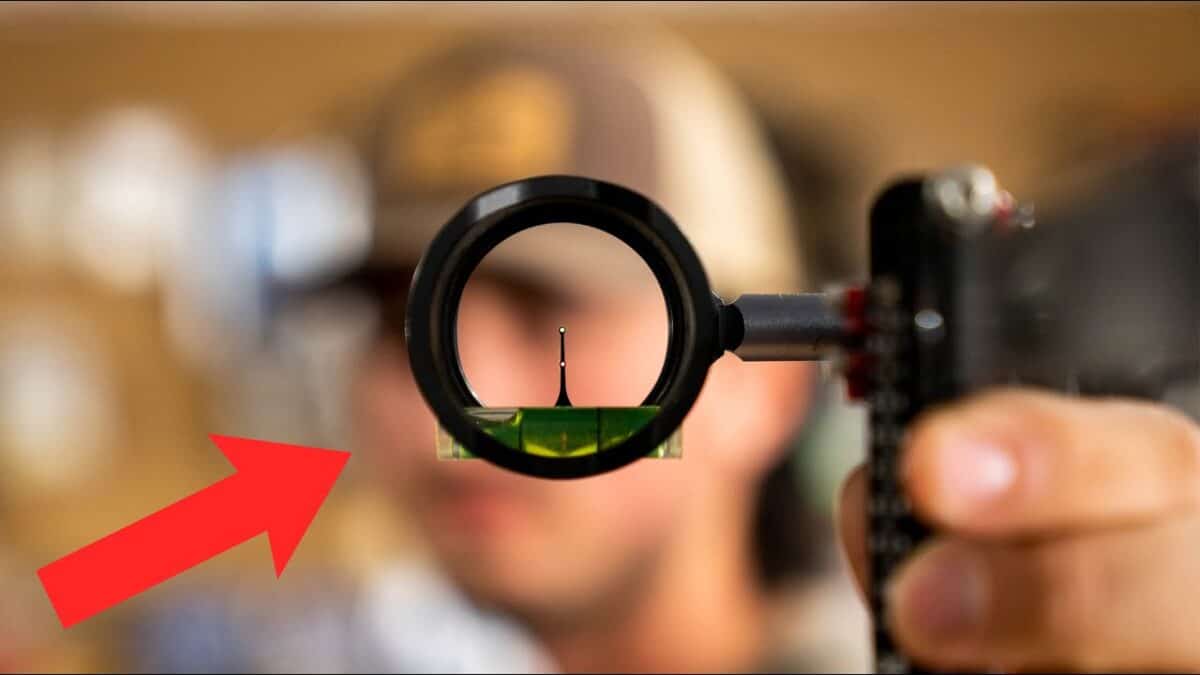
  1. First Axis: The first axis refers to the horizontal tilt of the bow sight. It determines whether the sight is properly aligned with the riser. To set the first axis, use a leveling tool to ensure that the sight housing is perfectly level. This adjustment is important for consistent left and right accuracy.
  2. Second Axis: The second axis refers to the vertical tilt of the bow sight. It controls the up and down trajectory of your arrows. To set the second axis, align the sight with a vertical reference point, such as a plumb line or a vertical target. Adjust the sight until the bubble level reads perfectly level. This will help you maintain consistent vertical accuracy.
  3. Third Axis: The third axis refers to the rotation of the bow sight around its vertical axis. It compensates for the effects of gravity on the trajectory of your arrows over longer distances. To set the third axis, aim the bow at a distant target and make slight left and right adjustments to ensure that the sight housing is perfectly aligned with the target.

Make small adjustments and recheck your levels after each adjustment. This will help you fine-tune your bow sight and ensure accurate shots. Understanding and properly setting these axes will greatly improve your shooting accuracy and confidence on the field.

Setting the 1st, 2nd, and 3rd Axis on a Bow Sight.

Setting the 1st Axis on a Bow Sight

  1. Mount your bow sight: Begin by mounting your bow sight securely on your bow using the appropriate screws or attachments.
  2. Level your bow: Use a leveling device to ensure your bow is perfectly level. This step is essential as it serves as the foundation for setting the 1st axis.
  3. Mount a leveling device on your sight: Attach a leveling device to your sight bracket, aligning it vertically. This device will be used to set the 1st axis.
  4. Adjust the 1st axis: Gradually adjust the 1st axis of your sight until the leveling device indicates that it is perfectly level. Use the appropriate screws or knobs to make these adjustments.
  5. Double-check: After setting the 1st axis, recheck the overall levelness of your bow. If necessary, make any additional adjustments to ensure everything is perfectly aligned.

By properly setting the 1st axis on your bow sight, you can significantly enhance your shot accuracy. Consult your bow manufacturer’s guidelines for any specific instructions related to your equipment.

Setting the 2nd and 3rd axis on your bow sight are also important for achieving optimal accuracy, but they require additional steps and expertise. It’s recommended to consult a professional bow technician or refer to your bow sight’s user manual for detailed instructions on setting these axes.

Setting the 2nd Axis on a Bow Sight

  1. Start by loosening the screws that hold the sight housing to the bow. This will allow you to make adjustments to the 2nd axis.
  2. Find a level surface or use a leveling device on your bow. Align your bow vertically using the leveling tool.
  3. With the bow in a vertical position, look through the peep sight and align the sight housing with a horizontal reference point, such as a fence or tree line.
  4. While maintaining the vertical position of the bow, adjust the 2nd axis screw on your bow sight. Use a bubble level to ensure the sight housing is perfectly level.
  5. Once the sight housing is level, tighten the screws that hold it in place on your bow. Make sure to verify the alignment to ensure there hasn’t been any movement during the process of tightening.

Remember, it’s essential to recheck and make adjustments as needed to ensure accuracy. Having the 2nd axis properly set will help you shoot more accurately and consistently.

Setting the 3rd Axis on a Bow Sight

Techniques for setting the 3rd axis to achieve accurate shots on inclined and declined terrains:

  1. Level your bow: Start by leveling your bow vertically, ensuring that it is straight up and down. This will serve as a reference point for setting the 3rd axis.
  2. Mount your bow sight: Attach the bow sight to your bow securely and ensure it is level both horizontally and vertically.
  3. Find an incline or decline: Look for a location with a known incline or decline, such as a hill or staircase, where you can practice setting the 3rd axis.
  4. Adjust the 3rd axis: Using the knobs or screws provided on the bow sight, make small adjustments to the 3rd axis until the bubble is centered when you are aiming at the incline or decline.
  5. Test your shot: Take several practice shots on the incline or decline to ensure that your arrows are hitting the target accurately. Make further adjustments if needed.

By following these techniques, you can effectively set the 3rd axis on your bow sight and be confident in achieving accurate shots on inclined and declined terrains.

Fine-Tuning the Axes on a Bow Sight

Tips and tricks for fine-tuning the axes to achieve optimal accuracy for individual archers.

Fine-tuning the axes on a bow sight is an essential step in achieving optimal accuracy for individual archers. By aligning the 1st, 2nd, and 3rd axes correctly, you can ensure that your shots are on target consistently. Here are some tips to help you fine-tune your bow sight axes:

  1. Align the 1st axis: The 1st axis of the bow sight determines the left and right accuracy. To set it correctly, make sure that the bubble level is centered within the sight housing. Adjust the horizontal alignment until the bubble remains centered when the bow is held in the shooting position.
  2. Adjust the 2nd axis: The 2nd axis controls the vertical alignment of your shots. Start by setting the bow sight at a distance of 20 yards and shoot a few arrows. If the arrows consistently hit either above or below the target, make adjustments to the 2nd axis until the shots are on target horizontally.
  3. Fine-tune the 3rd axis: The 3rd axis compensates for the bow’s natural cant or tilt. Shoot a few arrows on uneven ground and observe if the shots consistently drift left or right. Adjust the 3rd axis until the arrows are hitting the target accurately, regardless of the ground slope.

The process of fine-tuning the axes may require some trial and error. Take your time, be patient, and make small adjustments to achieve the desired accuracy. It’s also a good idea to consult with a professional archer or bow technician for expert guidance.

Troubleshooting Common Issues

Common problems encountered when setting the axes and how to fix them.

When it comes to setting the axes on a bow sight, it’s not uncommon to run into a few hiccups along the way. However, with some guidance, you can easily troubleshoot and overcome these challenges. Below are a few typical problems you might come across and the solutions to resolve them.

  1. Improper alignment: If your sight is not aligned properly, it can lead to inaccurate shots. To fix this, ensure that the sight housing is centered in relation to the bowstring and the riser. Adjust the sight’s windage and elevation knobs until the sight pin aligns with your target.
  2. Unstable sight picture: Sometimes, the sight picture may become shaky, making it difficult to aim consistently. This could be due to loose screws or faulty components. Tighten all screws on the sight to ensure stability. If the problem persists, inspect for any damaged or worn-out parts that may need replacement.
  3. Inconsistent arrow grouping: If your arrows are not grouping consistently, it could be a sign that your sight axis are not properly set. Ensure that the sight pins are aligned parallel to the bowstring and level with the arrow rest. Make adjustments to the sight’s second and third axis until your arrows consistently group together.

Remember, setting the axes on a bow sight requires patience and fine-tuning. Don’t hesitate to seek guidance from experienced archers or consult the manufacturer’s instructions specific to your sight model. By addressing these common issues, you’ll be on your way to achieving more accurate and consistent shots.

Conclusion

Setting the 1st, 2nd, and 3rd axis on a bow sight is crucial for achieving improved shooting accuracy. By properly aligning these axes, archers can ensure that their sights are accurately calibrated and that their arrows will consistently hit the target.

Remember, it’s always recommended to consult the manufacturer’s instructions or seek the help of an experienced archer when setting the axes on a compound bow sight. Their expertise and guidance can help you achieve optimal accuracy in your shots.

How to shoot a bow from a tree stand

How to shoot at a deer from a tree stand


 If you are an avid bowhunter, you may have considered the advantages of shooting from a tree stand. Shooting from an elevated position provides increased visibility and can give you a better shot angle as well as a better advantage over your prey by avoiding detection.  However, it’s important to understand that shooting a bow from a tree stand requires special techniques and considerations.

Why shooting a bow from a tree stand requires special techniques and considerations.

  1. Change in shooting angle: Shooting from a higher position means your shooting angles will be different than shooting on the ground. It’s crucial to practice shooting from a tree stand to become familiar with the changed sight picture, aiming, and shot execution.
  2. Obstructions and clear shooting lanes: When shooting from a tree stand, there may be branches, leaves, or other obstructions that can affect your shot placement. It’s important to clear shooting lanes and be mindful of potential obstructions to ensure an ethical and successful shot.
  3. Shot placement: Shooting from an elevated position can affect shot placement. Factors such as the distance to the target, the angle of the shot, and the trajectory of the arrow need to be considered to make an effective shot.
  4. Safety: Safety should always be a top priority when hunting from a tree stand. It’s essential to use a secure and stable tree stand, wear a safety harness, and follow all recommended safety guidelines to prevent accidents.

Proper Shooting Form in a Tree Stand

Shooting a bow from a tree stand requires a different approach and shooting form compared to shooting on the ground. To help you achieve accuracy and consistency, here are a few tips for proper shooting form and body posture from an elevated position.

  1. Stand Tall: When in a tree stand, it’s important to maintain an upright posture. Keep your back straight, shoulders relaxed, and feet shoulder-width apart. This will provide a stable base and allow for better control and accuracy.
  2. Bend at the Waist: To ensure proper alignment, bend at the waist, keeping your upper body forward. This will bring you closer to the target and help maintain balance while shooting.
  3. Anchor Points: Establish consistent anchor points to enhance your aim. This could include the position of your hand against your face, or the anchor point for your release aid. By maintaining these anchor points, you can achieve a consistent draw length and improve your accuracy.
  4. Practice: Practice regularly from a tree stand to familiarize yourself with the unique shooting angle and to build muscle memory. Set up a target at different distances and heights to simulate real hunting situations. This will help you become more comfortable and confident when it’s time to take a shot.                                                                                                                                                                                                                                                                                                                   By following these tips and practicing regularly, you can improve your shooting form and increase your chances of success while shooting a bow from a tree stand.

Adjusting for Shot Angles

Understanding how shot angles can affect your accuracy and aiming adjustments.

When hunting from a tree stand, it’s important to understand how shot angles can affect your accuracy and aiming adjustments.

Different shot angles require different adjustments in order to hit your target effectively. For example, when shooting from an elevated position, such as a tree stand, the trajectory of your arrow will be affected.

If the target is directly below you, the shot angle is near-vertical. In this case, you should aim slightly higher than the target to compensate for the drop in trajectory. On the other hand, if the target is at an angle, you may need to adjust your aim to the left or right, depending on the direction and angle of the shot.

It’s crucial to practice shooting from different angles and distances to become familiar with how shot angles impact your accuracy. Understanding these adjustments will help you increase your chances of hitting your target accurately when hunting from a tree stand.

Shooting Techniques from a Tree Stand

When it comes to hunting from a tree stand, accuracy and safety are paramount. As an archery enthusiast, you might be curious about the best methods and strategies for shooting a bow effectively from an elevated position.

Recommended practice drills to improve your shooting accuracy and confidence.

If you enjoy hunting from a tree stand, it’s important to practice shooting from an elevated position to ensure accuracy and build confidence.

Here are a few practice drills that we suggest:

  1. Elevated Platforms: Set up a practice platform at home or a nearby range to simulate the height and angle of a tree stand. Practice shooting from different distances and angles to mimic real hunting scenarios.
  2. Shoot While Sitting: Most hunters shoot from a seated position while in a tree stand. Practice shooting in this position to get comfortable and learn how to maintain proper form and stability.
  3. Use Tree Stand Railings: If your tree stand has a railing or shooting rail, practice using it for support. Learn how to rest your bow on the rail and shoot accurately while maintaining balance.
  4. Shoot from Different Angles: Practice shooting from different angles, including downward and side angles. This will help you understand how your arrows will fly and how to compensate for any potential obstructions.
  5. Practice in Hunting Gear: Wear your hunting gear, including bulky jackets and gloves, while practicing shooting from a tree stand. This will help you get comfortable with the added layers and ensure that they do not interfere with your shooting.

Regular practice is key to improving your shooting accuracy and confidence from a tree stand. By incorporating these drills into your routine, you will be better prepared for any hunting situation and increase your chances of a successful shot.

Common errors to watch out for and tips on how to avoid them.

When it comes to shooting a bow from a tree stand, there are a few common mistakes that can affect your accuracy and effectiveness. By being aware of these mistakes and following some helpful tips, you can improve your shooting skills and maximize your chances of success.

  1. Lack of practice: One common mistake is not practicing enough from a tree stand. Shooting from an elevated position requires different techniques and adjustments compared to shooting on flat ground. Make sure to practice regularly from a tree stand to familiarize yourself with the angle, balance, and shooting mechanics.
  2. Improper anchor point: Another mistake to avoid is an inconsistent anchor point. Your anchor point is where you consistently place your hand, nose, or jaw during the draw. Failing to establish a consistent anchor point can lead to inconsistent shots. Take the time to find a comfortable and repeatable anchor point to improve your accuracy.
  3. Lack of proper tree stand setup: Ensure that your tree stand is securely attached and stable before attempting to shoot. A wobbly stand can affect your aim and stability, leading to inaccurate shots. Always follow the manufacturer’s instructions and safety guidelines when setting up your tree stand.

By avoiding these common mistakes and implementing these tips, you can enhance your shooting skills and have a more successful hunting experience from a tree stand. Remember to always prioritize safety and practice regularly to improve your accuracy and confidence.

Conclusion

Summarizing the key points and emphasizing the importance of practicing shooting from a tree stand.

Practicing shooting from a tree stand is essential for every bowhunter who wants to maximize their hunting success. It offers a distinct advantage by providing a better vantage point and increased concealment. Here are the key points to remember:

  1. Safety first: Always prioritize safety when using a tree stand. Use a reliable safety harness and follow all safety guidelines.
  2. Practice regularly: Shooting from a tree stand requires adjustment to your shooting form and aim. Regular practice will help you become comfortable and accurate.
  3. Know your limits: Understand the effective range of your bow and practice shooting at different distances from your stand. This will help you make ethical and effective shots during hunting.
  4. Consider elevation: Take into account the angle and distance when shooting from an elevated position. Practice shooting from various angles to develop your skills.

Remember, shooting from a tree stand takes practice and familiarity. By regularly practicing and mastering this skill, you’ll increase your chances of a successful hunt and become a more confident bowhunter. Here is an excellent compound bow sight for tree stand hunting.

A Good Sight For A Compound Bow

DOUBLE PIN VS SINGLE PIN What Archery Scope Is Best For You?


A good sight for a compound bow is essential for aiming accurately and consistently. It helps archers align their sight picture with the target, ensuring that each shot is properly aimed. With a good sight, you can determine the distance to the target, adjust for windage and elevation, and make precise adjustments for different shooting conditions. A high-quality sight will have precise and repeatable adjustments, allowing you to consistently hit your target.

Factors to Consider When Choosing a Sight

When choosing a sight for your compound bow, there are several factors to consider in order to find the one that best suits your needs:

  1. Type of Sight: There are different types of sights available, including fixed pin sights, adjustable pin sights, and single-pin sights. Consider which type of sight will work best for your shooting style and preferences.
  2. Number of Pins: Fixed pin sights typically have multiple pins, while single-pin sights only have one adjustable pin. Choose the number of pins based on the distances you plan to shoot and how comfortable you are with making pin adjustments.
  3. Construction and Durability: Look for a sight that is made from durable materials such as aluminum or carbon fiber, as it will withstand the rigors of archery and last longer.
  4. Micro-Adjustability: Some sights offer micro-adjustment features, allowing for precise sight adjustments. This can be particularly useful for fine-tuning your aim and making incremental changes in windage and elevation.
  5. Lighting Options: Consider whether you want a sight with built-in illumination or fiber optic pins for better visibility in low-light conditions.
  6. Budget: Set a budget and choose a sight that offers the best features and value within your price range.

Here’s a table summarizing these factors:

Factors Considerations
Type of Sight Fixed pin, adjustable pin, or single pin
Number of Pins Based on shooting distances and personal preference
Construction Durable materials like aluminum or carbon fiber
Micro-Adjustability Fine-tune sight adjustments for precise aiming
Lighting Options Illumination or fiber optic pins for low-light visibility
Budget Set a budget and choose accordingly

By considering these factors, you can find a sight for your compound bow that meets your needs and enhances your shooting performance. Remember to also try out different sights and consult with experienced archers to get their recommendations and insights.

Fixed Pin Sight

Fixed Pin Sight Overview

When it comes to choosing the right sight for your compound bow, there are several options available. One popular choice among archers is the fixed pin sight. As the name suggests, this type of sight features a set number of pins that are permanently fixed to the sight housing. Each pin corresponds to a specific distance, allowing you to adjust your aim accordingly.

Advantages of Using Fixed Pin Sight:

  1. Simple and Easy to Use: One of the main advantages of using a fixed pin sight is its simplicity. With a fixed number of pins, you don’t have to worry about making any adjustments or calculations while aiming. Simply choose the pin that matches the distance to your target, and you’re ready to shoot.
  2. Cost-effective: Fixed pin sights are generally more affordable compared to other types of sights, making them a popular choice for beginners or budget-conscious archers.
  3. Durable: Since there are no moving parts, fixed pin sights are known for their durability. They can withstand rough handling and frequent use without losing their accuracy.

Disadvantages of Using Fixed Pin Sight:

  1. Limited Range: One drawback of fixed pin sights is their limited range. Since each pin corresponds to a specific distance, you may encounter difficulties when shooting at targets that fall between these distances. This can be particularly challenging in situations where you need to make precise shots at varying distances.
  2. Lack of Adjustability: Unlike other sights that offer micro-adjustments, fixed pin sights do not provide the same level of adjustability. Once the pins are set, you cannot make minor adjustments for windage or elevation without physically repositioning the sight pins.
  3. Less Versatility: Fixed pin sights are designed for specific distances, which may not be suitable for all shooting scenarios. If you frequently engage in different types of archery, such as target shooting and hunting, a sight with more adjustability might offer greater versatility.

It’s important to consider your individual shooting needs and preferences when choosing a sight for your compound bow. While the fixed pin sight has its advantages, it may not be the best option for everyone. Be sure to try out different types of sights and consult with experienced archers to find the one that works best for you.

Single Pin Slider Sight

Single Pin Slider Sight Overview

The single pin slider sight: is a sight that features a single adjustable pin that can be moved vertically along a slider. The pin can be adjusted to the desired yardage, allowing you to make precise shots at different distances. Unlike multiple pin sights, which can clutter your field of view, the single pin slider sight offers a clear sight picture and less distraction.

The slider on the sight allows you to make quick and easy adjustments to the pin placement, making it suitable for various shooting scenarios. Whether you’re shooting at a short distance or a longer range, you can easily adjust the pin to ensure accurate shots.

Advantages and Disadvantages of Using Single Pin Slider Sight

Using a single pin slider sight offers several advantages for archers. Here are some benefits to consider:

  • Accuracy: The single pin design allows for precise aiming, resulting in improved accuracy and tighter shot groups.
  • Clear Sight Picture: With only one pin in your field of view, you can focus better on your target and eliminate distractions.
  • Adjustability: The adjustable pin allows you to set the sight for different distances, making it versatile for various shooting situations.

Despite the advantages, it’s important to be aware of the potential disadvantages of using a single pin slider sight. Here are a few points to consider:

  • Shot Selection: With a single pin, you may need to rely on instinctive shooting or use a separate rangefinder for more accurate yardage estimation.
  • Adjustment Time: While the pin adjustment is quick, you may need to take the time to adjust for each shot, which can be impractical in fast-paced shooting scenarios.
  • Learning Curve: The use of a single pin slider sight may require some practice and adjustment to become comfortable with finding the right yardage quickly.

Ultimately, the decision to use a single pin slider sight on your compound bow will depend on your shooting style, proficiency, and personal preferences. It’s recommended to try out different sight options and see which one suits you best.

In conclusion, the single pin slider sight offers precise aiming, a clear sight picture, and adjustability, making it an excellent choice for many archers. However, it’s important to consider the potential limitations and ensure that the sight aligns with your shooting needs and preferences.

Multiple Pin Sight

Multiple Pin Sight Overview

A multiple pin sight typically consists of three to five fiber optic pins that are mounted on a bracket. Each pin is calibrated for a specific distance, such as 20, 30, 40, 50, and 60 yards. This allows archers to quickly and accurately aim at different targets without needing to adjust their sight for each shot. The pins are often color-coded or have different shapes to help archers differentiate between them easily.

One of the key advantages of a multiple pin sight is its versatility. With multiple pins, archers can shoot at various distances without the need for constant readjustment. This can be particularly beneficial when participating in 3D archery or hunting situations where targets may be at different ranges. Additionally, the fiber optics on the pins gather and amplify available light, making it easier to see the pins even in low-light conditions.

Advantages and Disadvantages of Using Multiple Pin Sight

Advantages:

  • Precise aiming at different distances without constant adjustments.
  • Versatility for shooting at various ranges.
  • Improved visibility with fiber optic pins.

Disadvantages:

  • Limited range calibration compared to single pin sights.
  • Can be visually cluttered with multiple pins.
  • Limited sight picture when dealing with long-distance shots.

It’s important to note that the performance of a multiple pin sight can vary depending on an archer’s individual preferences and shooting style. While some archers may appreciate the versatility and ease of use, others may prefer the simplicity and precision of a single pin sight.

In conclusion, a multiple pin sight is an excellent option for archers who require versatility in their shooting. The ability to aim accurately at different distances without constant adjustments can significantly enhance shooting performance. However, it’s essential to consider personal shooting preferences, target range, and lighting conditions when choosing the right sight for your compound bow.

Adjustable Sight

Adjustable Sight Overview

An adjustable sight is designed to provide flexibility and customization options to suit the archer’s preferences. It typically consists of a housing, a pin or multiple pins, and an adjustment mechanism. The housing holds the pin(s) in place and acts as a reference point for aiming. The pin(s) are small markers positioned within the housing, which the archer aligns with the target. The adjustment mechanism allows the archer to move the pins horizontally and vertically, making fine-tuned adjustments to accommodate different distances and shooting conditions.

Advantages and Disadvantages of Using Adjustable Sight

Using an adjustable sight offers several advantages for archers. Firstly, it provides flexibility, allowing them to adapt to different shooting scenarios. By adjusting the pins, archers can compensate for changes in target distance, wind conditions, and elevation. Secondly, an adjustable sight enables archers to fine-tune their shots with precision. They can make small adjustments to the sight, enhancing their accuracy and consistency over time. Lastly, adjustable sights are user-friendly and relatively easy to install and use.

However, like any other piece of equipment, adjustable sights have a few drawbacks. Firstly, the adjustment process can take time and practice to master. Archers need to learn how to make accurate adjustments quickly for optimal performance. Secondly, some archers may find the sight cluttered or distracting, especially if they use multiple pins. Lastly, adjustable sights are an additional expense, and archers must consider their budget when choosing the right sight for their compound bow.

In conclusion, an adjustable sight can be a good choice for archers looking to enhance their shooting experience with a compound bow. It offers flexibility, precision, and customization options, allowing archers to adapt to different shooting conditions and improve their accuracy. However, it’s important to consider personal preferences, budget, and practice time before making a decision.

Additional info on different compound bow sights can be found here.

Tips For Sighting in a Compound Bow

The Best Way to Sight in Your Bow


Sighting in your compound bow is essential if you want to achieve accuracy in your shots. Failing to do so can result in missed targets and frustration. Here are a few reasons why proper sighting is crucial:

  1. Achieve Consistency: Sighting in your compound bow ensures that each shot you take is consistent. It helps you develop muscle memory and allows you to make small adjustments as needed.
  2. Increase Accuracy: Proper sighting improves your accuracy by fine-tuning the alignment between your sight pins and target. It ensures that your arrows consistently hit the mark.
  3. Boost Confidence: When you know that your compound bow is properly sighted, it instills confidence in your shooting abilities. This can positively impact your performance during competitions or hunting trips.

How it affects overall performance

Properly sighting in your compound bow can have a significant impact on its overall performance. Here’s how:

  1. Better Shot Placement: When your compound bow is accurately sighted, you can consistently hit your desired target area, leading to better shot placement and increased success rates.
  2. Increased Effective Range: By sighting in your compound bow, you can determine the maximum effective range for your setup. This enables you to make confident shots within that range.
  3. Reduced Variability: Sighting in your compound bow diminishes the variability of your shots, making them more predictable and precise.

By avoiding the common mistakes that many archers make when sighting in their compound bows, you can ensure optimal performance and accuracy on the range or out in the field.

Choosing the Right Sight

Different types of sights available for compound bows

  • Pin sights: These are the most common and basic type of sights. They have multiple pins that can be adjusted for different distances.
  • Pendulum sights: These sights are designed specifically for shooting from elevated positions, such as tree stands. They automatically compensate for the angle of the shot.
  • Slider sights: These sights allow for single-pin adjustment and are great for long-distance shooting.
  • Fixed-pin movable sights: These sights have adjustable pins that can be set to specific distances.
  • Holographic sights: These sights use a holographic projection to provide a clear image of the target.

Factors to consider when selecting a sight

  • Accuracy: Look for a sight that provides precise and consistent aiming points.
  • Durability: Choose a sight that is made from quality materials and can withstand regular use in various conditions.
  • Adjustability: The sight should be easy to adjust and fine-tune to your shooting preferences.
  • Visibility: Opt for a sight that offers clear and bright sight pins or reticles.
  • Compatibility: Ensure that the sight is compatible with your compound bow and mounting system.

Avoid these common mistakes when sighting in a compound bow:

  1. Rushing the process: Take your time to properly set up and adjust your sight.
  2. Neglecting proper form: Maintain consistent form while shooting to improve accuracy.
  3. Ignoring environmental factors: Consider wind, lighting, and other conditions that can affect your aim.
  4. Failing to practice: Regular practice will help you fine-tune your aiming skills.
  5. Overcomplicating adjustments: Start with simple adjustments and gradually make changes if needed.

By avoiding these mistakes, you can improve your accuracy and make the most out of your compound bow.

Establishing Correct Anchor Points

The significance of consistent anchor points

Having consistent anchor points when sighting in a compound bow is crucial for accuracy and consistency in your shots. Anchor points refer to the specific positions on your face and body where you rest the bowstring against when drawing and aiming.

By maintaining the same anchor points every time you shoot, you ensure that your shots are consistent and predictable. This consistency allows you to make accurate adjustments to your aim or equipment if needed.

Tips for achieving proper anchor points

  1. Strive for consistency: Practice drawing and aiming your bow while paying attention to where your hand and string touch your face. By repeating this process consistently, you will establish reliable anchor points.
  2. Use reference points: Some archers find it helpful to use reference points, such as placing the corner of their mouth on the string or resting their thumb against their jawbone. These reference points provide a reliable way to consistently position the bowstring against your face.
  3. Seek feedback: Have someone watch and provide feedback on your shooting form. They can help identify any inconsistencies in your anchor points and offer suggestions for improvement.
  4. Regular practice: Consistently practicing your shooting technique will help reinforce the muscle memory required for consistent anchor points. Make it a habit to shoot regularly to maintain accuracy and prevent any regression in form.

By establishing correct and consistent anchor points when sighting in a compound bow, you can significantly improve your accuracy and overall shooting performance.

Understanding Pin Adjustment

When sighting in a compound bow, it’s crucial to understand how to adjust the pins for different distances and wind conditions. Here are some important tips to help you get it right:

How to adjust pins for different distances and wind conditions

  1. Determine your desired distances: Start by deciding the specific distances you want to sight in your pins for. This will depend on your shooting style and the type of game you are hunting.
  2. Adjust individual pins: Each pin on your sight can be adjusted independently. Start with the top pin and adjust it to the desired distance, then move on to the subsequent pins.
  3. Consider wind conditions: When adjusting pins, remember to factor in wind conditions. Wind can affect arrow trajectory, so make sure to compensate for it by adjusting the pins accordingly.

Common mistakes to avoid during pin adjustment

  1. Rushing the process: Taking time to properly align and adjust your pins is crucial for accuracy. Rushing can lead to inconsistent shooting.
  2. Neglecting fine-tuning: Don’t settle for ballpark adjustments. Fine-tuning your pin settings is necessary for precise shooting at different distances.
  3. Failing to practice: Adjusting your pins alone is not enough. Regular practice is essential to ensure you are comfortable and accurate with your sight settings.

By understanding pin adjustment and avoiding these common mistakes, you can ensure that your compound bow is properly sighted in for accurate and effective shooting.

Proper Shooting Form

When it comes to sighting in a compound bow, having proper shooting form is essential for accuracy and consistency. Your shooting form directly affects how your arrows land on the target. To ensure you hit your target consistently, avoid these common form mistakes:

The role of proper shooting form in accurate sighting

Having a good shooting form enables you to achieve a consistent anchor point, release motion, and follow-through. This consistency increases your chances of effectively sighting in your compound bow. When your form is correct, you have better control over your bow and can make adjustments more accurately.

Common form mistakes to avoid

  1. Incorrect grip: Avoid gripping the bow handle too tightly or unevenly. This can cause torque and affect accuracy. Instead, maintain a relaxed and balanced grip.
  2. Improper anchor point: Your anchor point is the consistent spot where you draw the bowstring back to your face. Inconsistent anchor points can lead to inconsistent shots. Find a comfortable and repeatable anchor point.
  3. Incorrect stance: Your stance should be balanced and aligned with the target. Avoid tilting or leaning too much, as it can throw off your accuracy.
  4. Poor release technique: A smooth and controlled release is crucial for accurate shots. Avoid jerking the release or plucking the string, as it can affect arrow flight.
  5. Inconsistent follow-through: After releasing the arrow, maintain your form and follow-through with the shot. Abrupt movements or dropping your bow arm prematurely can affect accuracy.

By avoiding these common mistakes and practicing proper shooting form, you can improve the accuracy of your compound bow sightings. Remember to always prioritize safety when handling any archery equipment. Here are additional tips if you are using sight tape.

Compound Bow Sights Explained

Bow Sight Hunting Tech Tip


Compound bow sights are essential tools for archers, especially those involved in competitive shooting or hunting. They enable precise aiming by providing a clear sight picture and increasing accuracy. The purpose of these sights is to reduce human error and improve consistency in shooting.

Different types of sights available in the market

There are several types of compound bow sights available in the market:

  1. Fixed Pin Sights: These sights have multiple pins set at specific distances, allowing archers to adjust their aim according to the range of their target.
  2. Single Pin Sights: This type of sight has a single pin that can be adjusted for different ranges, providing a simplified aiming process.
  3. Pendulum Sights: Pendulum sights are specifically designed for hunting from an elevated position, automatically compensating for the angle and gravity drop.
  4. Moveable Pin Sights: These sights have a movable pin that can be adjusted quickly and easily, offering flexibility for varying shooting distances.

Each type of sight has its own advantages and suits different shooting styles and preferences. Choosing the right sight depends on factors such as shooting discipline, target range, and personal preference.

Fixed Pin Sights

Explanation of fixed pin sights

Fixed pin sights are a type of sight commonly used in archery, specifically with compound bows. These sights consist of multiple pins that are fixed at different distances. Each pin corresponds to a specific distance, allowing archers to accurately aim at different targets at varying distances.

Advantages and disadvantages of using fixed pin sights

Advantages:

  • Easy to use: Fixed pin sights are straightforward and simple to understand and use.
  • Affordable: Compared to other types of bow sights, fixed pin sights are often more budget-friendly.
  • Quick adjustments: Once the pins are set, archers can quickly adjust their aim without the need for further modifications.

Disadvantages:

  • Limited range: Fixed pin sights have a limited range since the pins are set at specific distances.
  • Less versatility: If an archer wants to shoot at different distances, they may need to adjust their form or use holdover or holdunder techniques.
  • Less precision: Fixed pin sights may not provide the same level of precision for longer distances compared to other types of sights.

In conclusion, fixed pin sights provide simplicity and affordability but have limitations in terms of range and versatility. Popular models like the Trophy Ridge React-One, HHA Optimizer Lite, and Spot Hogg Fast Eddie offer different features to cater to various archery needs.

Single Pin Sights

Single pin sights are a popular choice among archers due to their simplicity and accuracy. They consist of a single adjustable pin that is used to aim at the target. Here is an explanation of single pin sights and their advantages and disadvantages:

Explanation of single pin sights

Single pin sights have a sight housing that holds a single adjustable pin. This pin can be moved vertically to account for different distances. The archer adjusts the pin based on the estimated distance to the target, allowing for precise aiming. Single pin sights usually have a yardage tape or markings on the sight housing to help with distance estimation.

Advantages and disadvantages of using single pin sights

Advantages:

  • Increased accuracy: With only one pin, archers can focus solely on aiming without any distractions.
  • Clear sight picture: Single pin sights provide a clear field of view, allowing for better target acquisition.
  • Simple to use: Adjusting a single pin is less complicated than dealing with multiple pins.

Disadvantages:

  • Limited range estimation: Single pin sights require the archer to estimate distances accurately, which can be challenging in certain situations.
  • Slower adjustment: Changing the pin position for different distances may take time, potentially affecting shooting speed.

In summary, single pin sights provide simplicity and accuracy in archery. While they have their limitations, they are preferred by many archers for their ease of use and clear sight picture.

Multi-Pin Sights

Explanation of multi-pin sights

Multi-pin sights are a popular choice among archers and bowhunters. These sights feature multiple pins that are adjustable for different distances. Each pin represents a specific distance, typically ranging from 20 to 60 yards. When aiming at a target, the archer simply selects the appropriate pin based on the desired distance.

The main advantage of multi-pin sights is their versatility. They allow for quick and easy adjustments, making them perfect for shooting at various distances without the need for constant sight adjustment. This makes them popular among hunters who may encounter targets at different ranges.

Advantages and disadvantages of using multi-pin sights

Advantages:

  • Versatility: Multi-pin sights offer the ability to accurately aim at different distances without constant adjustment.
  • Quick target acquisition: With multiple pins available, archers can quickly choose the appropriate pin for the target distance.
  • Accuracy: Once properly calibrated, multi-pin sights can provide consistent and accurate shot placement.

Disadvantages:

  • Potentially cluttered sight picture: More pins in the sight can lead to a busy or cluttered sight picture, which may require additional time to aim.
  • Limited range: The number of pins available on a multi-pin sight is typically capped, limiting the effective range of shooting.

Overall, multi-pin sights are a reliable choice for archers and bowhunters who value versatility and ease of use in aiming at different distances.

Here is some additional information on using compound bow sights.

What Yardage Should I Sight In My Bow

Have you ever wondered what yardage you should sight in your bow? Proper bow sighting is crucial for accurate shooting and can greatly improve your overall archery performance. When it comes to choosing the right yardage for bow sighting, there are several factors to consider. In this article, we will explore the importance of proper bow sighting and discuss the factors you should take into account when deciding on the optimal yardage for your bow.

The Importance of Proper Bow Sighting

Proper bow sighting plays a significant role in achieving accurate shots. When you sight in your bow, you align the sight with the arrow’s trajectory to ensure that your arrow will hit the target accurately. This process helps you compensate for factors such as distance, windage, and arrow drop, allowing you to make precise shots consistently.

Factors to Consider for Bow Sighting

To determine the appropriate yardage for bow sighting, consider the following factors:

  1. Maximum Effective Range: Determine the maximum distance at which you are confident in making an accurate shot. This can vary depending on your skill level and shooting abilities.
  2. Typical Hunting Range: Determine the average distance at which you typically shoot game. This will help you align your sight with distances that reflect real-world hunting scenarios.
  3. Arrow Trajectory: Consider the trajectory of your arrow. Arrows have a curved flight path, and the point of impact will vary at different distances. Sighting in at a specific yardage can help you familiarize yourself with your arrow’s trajectory and adjust your aim accordingly.
  4. Personal Preference: Some archers prefer sighting in at shorter distances, such as 20 yards, while others prefer longer distances, such as 40 or 50 yards. Your personal shooting style and comfort level should be taken into account when determining the yardage for bow sighting.

Remember to make incremental adjustments to your sight as you experiment with different yardages. It’s essential to practice regularly and fine-tune your sight to achieve consistent accuracy.

In conclusion, determining the optimal yardage for bow sighting is a personal decision that depends on various factors. Consider your skill level, shooting abilities, maximum effective range, typical hunting range, arrow trajectory, and personal preference when choosing the yardage for bow sighting. With proper bow sighting, you can enhance your shooting accuracy and elevate your archery performance.

Understanding Yardages

Determining the ideal yardage to sight in your bow is a crucial step in achieving accurate and consistent shots. The yardage at which you sight in your bow refers to the distance at which the arrow will hit the target precisely. But how do you determine the right yardage for your bow? Let’s break it down.

Different Yardages and their Significance

When it comes to sight-in yardages, there are a few key distances that archers commonly use: 20 yards, 30 yards, and 40 yards. These yardages serve as reference points for aligning your bow to hit the target accurately at different distances. Here is a breakdown of their significance:

  1. 20 Yards: This is the most commonly used sight-in distance and serves as the “point-blank” range. When you sight in your bow at 20 yards, your arrow’s trajectory will have a relatively flat arch. Ensuring accuracy within close distances.
  2. 30 Yards: Sighting in at 30 yards allows for a balance between close and moderate distances. This yardage is useful for hunting scenarios where shots may be slightly farther away.
  3. 40 Yards: 40 yards is primarily used for long-distance shooting or hunting situations where targets are located at extended ranges. It provides a reference point for adjusting your aim when taking shots at longer distances.

Determining the Ideal Yardage

The ideal sight-in yardage for your bow can vary depending on factors such as your shooting style, arrow speed, and target distances you commonly encounter. To determine the best yardage for your bow, consider the following steps:

  1. Trial and Error: Experiment with different yardages and observe the impact points of your arrows on the target. Adjust your sight accordingly until you achieve consistent accuracy.
  2. Talk to Experienced Archers: Seek advice from experienced archers or coaches who have expertise in your particular style of archery. They can provide valuable insights and recommendations based on their knowledge and experience.
  3. Consider Your Shooting Goals: Determine the typical shooting scenarios you encounter. If you primarily shoot in a controlled environment, a shorter sight-in distance may suffice. However, if you frequently engage in outdoor shooting or hunting, a longer sight-in distance may be necessary.

Remember, the ideal sight-in yardage can be subjective and may vary for each archer. It is essential to find a balance between comfort, accuracy, and the shooting scenarios you commonly encounter.

Using the right yardage to sight in your bow will not only improve your accuracy but also boost your confidence. Take the time to experiment and find the yardage that works best for you. Always prioritize safety and adherence to local regulations while shooting.

Setting up a Bow Sight

When it comes to setting up a bow sight, one important consideration is determining the yardage at which you should sight in your bow. This will greatly impact the accuracy and effectiveness of your shots. Here are some factors to consider when deciding on the appropriate yardage for your bow sight.

Choosing the Right Bow Sight: Before you can determine the yardage, it’s essential to choose the right bow sight for your needs. There are various types of bow sights available, including fixed pin sights, movable pin sights, and single pin sights. Each type has its advantages and disadvantages, so it’s important to consider factors such as your shooting style, target distance, and personal preference when making your selection.

Factors to Consider: When deciding on the yardage to sight in your bow, there are several factors to keep in mind. These include the typical shooting distance, the specific type of shooting you plan to do (hunting or target shooting), and your level of expertise. It’s important to consider your comfort and confidence level when choosing the appropriate yardage.

Recommended Yardage: The recommended yardage to sight in your bow will vary depending on individual factors. However, a common practice is to start with a shorter distance, such as 20 yards, and gradually increase the yardage as you become more comfortable and proficient with your bow. Some archers prefer to sight in their bow at specific distances, such as 30, 40, or 50 yards, depending on their shooting goals and objectives.

Here’s a table to help you understand the process:

Factors to Consider Recommended Yardage
Shooting Style Varies
Target Distance Varies
Shooting Purpose (Hunting or Target Shooting) Varies
Skill Level Varies

Additional Tips: It’s important to note that these are general guidelines, and the optimal yardage for your bow sight might differ based on your unique circumstances. It’s always a good idea to consult with experienced archers or bow technicians for personalized advice. Additionally, as you become more experienced, you may want to fine-tune your bow sight to specific distances to maximize your accuracy.

In conclusion, determining the appropriate yardage to sight in your bow is crucial for optimizing your shooting accuracy. Factors such as shooting style, target distance, and shooting purpose will influence your decision. It’s important to choose the right bow sight and gradually increase the yardage as your skills improve. Always seek expert advice for personalized guidance.

Testing and Fine-Tuning

One of the most critical factors for accuracy is properly sighting in your bow. The yardage at which you sight in your bow will determine the point of impact when you shoot at different distances. Let’s explore some guidelines to help you make an informed decision.

Shooting at Various Distances

To determine the yardage at which you should sight in your bow, it’s essential to shoot at various distances and see how your arrows group on the target. Start by shooting at a close distance, such as 20 yards, and observe where your arrows land. Then, progressively shoot at longer distances, like 30, 40, and 50 yards, and see how the arrow groups change.

During this process, pay attention to the consistency of your arrow groups. Ideally, your arrows should form tight clusters around the same point of impact. If you notice that the arrow groups are consistently higher, lower, left, or right, adjustments may be needed to fine-tune your bow’s sight.

Making Adjustments for Accuracy

Once you’ve identified the distance at which your arrows group most consistently, it’s time to make adjustments to your bow’s sight. Most bow sights feature adjustable pins that allow you to change the yardage settings. The number of pins and the adjustability range may vary depending on the sight model.

To adjust your sight, use the following steps:

  1. Determine the distance at which your arrows group consistently.
  2. Locate the adjustment screws or knobs on your bow sight.
  3. Use the appropriate tool (usually an Allen wrench) to turn the screws or knobs and move the sight pins.
  4. Make small adjustments, shooting a few arrows at each distance to verify the changes.
  5. Repeat the process until your arrows consistently hit the target at the desired yardage.

Remember, sighting in your bow is an ongoing process. Environmental factors, changes in arrow weight, and other variables can affect your bow’s accuracy. It’s a good idea to periodically recheck and adjust your sight to maintain optimal performance.

By following these guidelines and experimenting with different distances, you can find the yardage at which to sight in your bow for the best accuracy. Each archer may have slightly different preferences, so it’s crucial to consider factors like shooting style, arrow speed, and personal comfort. Happy shooting!

Archery Styles and Yardage Preferences

When it comes to archery, one of the essential factors to consider is the yardage at which you should sight in your bow. The ideal yardage can vary depending on the archery style and your specific goals. Whether you are a hunter or a target shooter, it is important to understand the recommended yardage for each style.

Yardage Recommendations for Hunting

For hunters, the yardage at which you sight in your bow can significantly impact your success in the field. The ideal yardage will vary depending on the type of game you are hunting and your shooting abilities. However, there are some general recommendations that can serve as a good starting point.

Short-Range Hunting: If you primarily hunt in dense woods or thick cover, where shots are typically within 20 to 30 yards, it is recommended to sight in your bow at around 20 yards. This ensures that your arrow flies flat and hits your target accurately within this range.

Mid-Range Hunting: For hunters who often encounter shots between 30 and 40 yards, sighting in your bow at around 30 yards is a good choice. This allows you to have a slight uphill or downhill trajectory while still maintaining accuracy within this distance.

Long-Range Hunting: If you are confident in your shooting abilities and often take shots beyond 40 yards, it is advisable to sight in your bow at a farther distance, such as 40 or 50 yards. This accommodates for the increased arrow drop at longer distances while still maintaining good accuracy.

Yardage Recommendations for Target Shooting

When it comes to target shooting, the yardage at which you sight in your bow will depend on the specific target distances you prefer. Some archers prefer shooting at close ranges, while others enjoy the challenge of longer distances. Here are some recommendations for different target shooting preferences.

Close-Range Target Shooting: If you enjoy shooting at shorter distances, such as 20 to 30 yards, sighting in your bow at 20 yards is a common choice. This allows you to fine-tune your aim and achieve consistent accuracy at these closer ranges.

Medium-Range Target Shooting: For archers who like shooting at distances between 30 and 40 yards, sighting in your bow at 30 yards provides a good balance between precision and challenge. It allows you to practice aiming for targets at slightly longer distances while still maintaining accuracy.

Long-Range Target Shooting: If you want to test your skills at longer distances, sighting in your bow at 40 or 50 yards is recommended. This allows you to practice compensating for arrow drop and wind drift at extended ranges while still achieving accurate shots.

Remember, these yardage recommendations are just starting points, and you can adjust your sight settings as needed to fine-tune your accuracy. It is also essential to practice regularly to become comfortable and proficient at different yardages.

Compound Bow Target Sights

Compound bows have gained immense popularity among archery enthusiasts due to their power and accuracy. To enhance precision, many archers rely on target sights. Target sights are vital accessories that help archers improve their aim and ensure consistent performance. Let’s take a closer look at the importance of compound bow target sights and how they can affect accuracy.

Importance of Compound Bow Target Sights

Target sights are crucial for archers as they provide precise aiming points that allow for consistent and accurate shots. These sights consist of a sight window, a sight pin or aperture, and an adjustable mount. The sight window allows the archer to visually align the bow’s sight pin or aperture with the target. The adjustable mount allows for fine-tuning the sight’s position, ensuring optimal sighting for each individual archer.

Target sights are particularly important for competition archers who aim to achieve the highest level of accuracy. With the help of target sights, archers can consistently hit the center of the target, ultimately improving their scores. Even for recreational archers, using target sights can enhance their overall shooting experience by increasing accuracy and confidence.

How Target Sights Affect Accuracy

The accuracy of a compound bow largely depends on the archer’s ability to align the sight pin or aperture with the target. Here are a few ways in which target sights affect accuracy:

  1. Increased Precision: Target sights provide a precise aiming point, allowing archers to focus on their target and make minor adjustments to improve their aim. This level of precision significantly improves accuracy, especially over longer distances.
  2. Consistency: Target sights enable archers to establish a consistent sight picture. By consistently aligning the sight pin or aperture with the target, archers can develop muscle memory and repetition, leading to improved accuracy.
  3. Adjustability: Most target sights are adjustable, allowing archers to fine-tune their aiming point. Adjusting the sight’s elevation and windage settings compensates for varying shooting conditions and helps maintain accuracy across different distances.

Using target sights is an effective way to take your archery skills to the next level. However, it’s essential to practice regularly with your chosen sight to become familiar with its settings and make necessary adjustments for optimal accuracy.

Remember to consult with experienced archers or professionals when selecting a target sight that suits your shooting style and goals. Each archer has unique preferences, and experimenting with different target sights can help you find the one that works best for you.

In conclusion, compound bow target sights play a crucial role in improving accuracy and consistency for archers. Whether you’re a recreational archer or a competitive shooter, using target sights can enhance your shooting experience and help you achieve your full potential on the range or in competitions.

Single Pin vs. Multi-Pin Target Sights

When it comes to compound bow target sights, archers have the option to choose between single pin and multi-pin sights. Both types have their advantages and disadvantages, so it’s important to understand the differences to make an informed decision. Let’s take a closer look at each type:

Advantages and Disadvantages of Single Pin Target Sights

Single pin target sights: As the name suggests, single pin sights have only one aiming point, which can be adjusted for different distances. This type of sight offers excellent accuracy and allows archers to focus on a single target. By having only one pin, the sight picture remains uncluttered and makes it easier to aim in high-pressure situations. However, using a single pin can be time-consuming when transitioning between different distances since it requires manual adjustment.

Advantages and Disadvantages of Multi-Pin Target Sights

Multi-pin target sights: Unlike single pin sights, multi-pin sights have multiple aiming points, usually three to five pins. Each pin can be set at a different distance, allowing for quicker and more convenient aiming at various targets. Multi-pin sights are especially useful for 3D target shooting or field archery where distances can vary. However, having multiple pins in the sight picture can sometimes cause distractions or confusion, especially for beginners. It may take some practice to align the correct pin with the target quickly.

Here’s a table to summarize the differences between single pin and multi-pin target sights:

Sight Type Single Pin Multi-Pin
Aiming Points One Multiple
Accuracy Excellent Good
Ease of Use Requires manual adjustment Quick and convenient
Cluttered Sight Picture No Possible distractions
Best Suited for Precision target shooting 3D target shooting or field archery

Overall, whether you choose a single pin or multi-pin target sight depends on your shooting style, preference, and the types of archery you participate in. Consider your skill level, the distances you shoot at, and how quickly you need to aim to determine which sight will best suit your needs. It is also a good idea to try out different sights if possible before making your final decision to find the one that feels most comfortable and improves your accuracy on the range.

Fixed vs. Adjustable Target Sights

When it comes to choosing the right target sight for your compound bow, there are two main options to consider: fixed sights and adjustable sights. Each type has its own unique features and benefits, so it’s important to understand the differences before making a decision.

Features and Benefits of Fixed Target Sights

Fixed target sights: These sights have a predetermined number of pins that are permanently set in place. They are typically available in configurations of three, four, five, or even more pins. The pins are set at specific distances, usually corresponding to different ranges. Some of the key features and benefits of fixed target sights include:

  1. Simplicity: Fixed sights are simple and easy to use. Once the pins are set, you don’t have to make any additional adjustments.
  2. Consistency: The fixed pins provide consistent aiming points, making it easier to target specific distances accurately.
  3. Durability: Fixed sights are usually more durable and less prone to damage or malfunctions since they have fewer moving parts.

Features and Benefits of Adjustable Target Sights

Adjustable target sights: These sights allow you to make changes to the position and configuration of the pins. They offer more flexibility and customization compared to fixed sights. Here are some of the key features and benefits of adjustable target sights:

  1. Customization: With adjustable sights, you can fine-tune your aiming points to match your shooting style, preferences, and the specific range.
  2. Adaptability: Adjustable sights are versatile and can be used for various shooting conditions and distances.
  3. Improved Accuracy: By making precise adjustments to the pins, you can achieve greater accuracy and tighten your groupings.

Whether you prefer the simplicity and consistency of fixed target sights or the customization and adaptability of adjustable target sights, it ultimately comes down to personal preference and shooting style. Consider your skill level, shooting goals, and the specific requirements of your chosen discipline to make an informed decision.

Top Compound Bow Target Sights in the Market

When it comes to precision shooting in archery, having the right target sight for your compound bow is crucial. Target sights help archers aim accurately and consistently, ensuring better performance on the range or during competitions. Here are three top-quality compound bow target sights that are highly regarded by archery enthusiasts.

Spot Hogg Fast Eddie XL Target Sight

The Spot Hogg Fast Eddie XL Target Sight is a favorite among many archers for its exceptional build quality and precision. It features micro-adjustable pins that allow for convenient and precise windage and elevation adjustments. The sight also has a quick-adjust yardage knob that facilitates effortless changes while maintaining stability. With its rugged, durable construction, the Fast Eddie XL is designed to withstand the rigors of competitive shooting.

Axcel AccuTouch Carbon Pro Target Sight

The Axcel AccuTouch Carbon Pro Target Sight is a popular choice for archers seeking a lightweight yet high-performing sight. Its carbon fiber construction not only offers strength and durability but also reduces overall weight. The AccuTouch Carbon Pro features a micro-adjustable knob system that allows for precise and repeatable movement adjustments. Additionally, it boasts a removable scope for customization and built-in vibration dampening for a smoother shot experience.

Black Gold Ascent Verdict Target Sight

The Black Gold Ascent Verdict Target Sight is known for its innovative features and precise adjustments. It offers a micro-adjustable dovetail bracket system, allowing archers to fine-tune their aim quickly. The Verdict sight incorporates a large 2nd axis Gang adjustment for enhanced accuracy when shooting at longer distances. With its solid construction and smooth operation, it is favored by many competitive archers.

Here’s a table summarizing the key details of each target sight:

Target Sight Spot Hogg Fast Eddie XL Axcel AccuTouch Carbon Pro Black Gold Ascent Verdict
Material Not specified Carbon Fiber Not specified
Micro-adjustable Yes Yes Yes
Weight Not specified Lightweight Not specified
Additional Features Quick-adjust yardage knob Removable scope Micro-adjustable dovetail
bracket system

These compound bow target sights offer exceptional quality and performance for archers aiming for accuracy and consistency on the range. Consider your specific needs and preferences when choosing the right target sight for your compound bow.

Factors to Consider When Choosing a Compound Bow Target Sight

Brightness and Visibility

When it comes to using a compound bow for target shooting, having a reliable and accurate target sight is crucial. A target sight helps archers achieve consistent aim and precision during their shots. However, with so many options available in the market, it can be challenging to choose the right one that suits your needs. One important factor to consider when selecting a target sight is its brightness and visibility features.

Brightness: One of the key features to look for in a target sight is its brightness settings. The sight should have adjustable brightness levels to accommodate different lighting conditions. This ensures that you can easily see your sight pins in dim light or bright sunlight. Some sights even feature fiber-optic pins that gather and amplify light, enhancing overall brightness and visibility.

Visibility: Another important aspect to consider is the size and design of the sight pins. Larger pins are often easier to see and aim with, especially for beginners or those with vision issues. On the other hand, smaller pins may provide more precision for experienced archers. Additionally, consider the color of the pins and how they contrast against the target faces to ensure clear visibility.

Here’s a table summarizing the brightness and visibility features of three popular compound bow target sights:

Target Sight Model Brightness Levels Sight Pin Size Sight Pin Color
Sight Model A Adjustable Large Red
Sight Model B High/Low settings Medium Green
Sight Model C Three levels Small Yellow

Remember, choosing the right target sight for your compound bow is essential for achieving consistent and accurate shots. Considering the brightness and visibility features will help you make an informed decision that suits your shooting style and preferences.

Compound Bow Sights For Hunting

Compound bow sights are essential tools for hunters, providing improved accuracy and precision when aiming at their targets. These sights are designed to help hunters align and aim their shots more effectively, increasing the chances of a successful hunt.

With the advancement in technology, compound bow sights have become more advanced and offer a range of features to cater to the needs of different hunters. We will explore the benefits of using compound bow sights for hunting and the importance of choosing the right sight for your hunting adventures.

Benefits of Using Compound Bow Sights for Hunting

Using compound bow sights can significantly enhance a hunter’s accuracy and consistency when shooting. The following are some of the key benefits of using compound bow sights for hunting:

  1. Increased Accuracy: Compound bow sights provide hunters with a visual reference point to aim their shots accurately. With the help of pins or reticles, hunters can align their aim with their target, improving their overall shooting accuracy.
  2. Better Range Estimation: Many compound bow sights feature adjustable pins or reticles that allow hunters to estimate the distance between themselves and their targets. This feature is crucial for making precise and effective shots, especially when hunting long-range targets.
  3. Improved Precision: Compound bow sights offer micro-adjustment features, enabling hunters to fine-tune their aim and ensure the highest level of precision when shooting. This level of adjustability is essential when dealing with different shooting scenarios and environmental conditions.

Importance of Choosing the Right Sight

Choosing the right compound bow sight is crucial for maximizing your hunting experience. Here are some factors to consider when selecting a compound bow sight:

  1. Type of Sight: There are various types of compound bow sights, including fixed pin sights, moveable pin sights, and single pin sights. Each type offers different features and benefits, so it’s essential to choose one that suits your hunting style and preferences.
  2. Adjustability: Look for a compound bow sight that offers a high level of adjustability, allowing you to fine-tune your aim according to various shooting situations. Adjustable brightness settings and windage adjustments are also desirable features to consider.
  3. Durability: Since hunting involves rough outdoor conditions, it’s crucial to choose a compound bow sight that is durable and able to withstand wear and tear. Look for sights made from high-quality materials, such as aluminum, that can endure the rigors of hunting.

By choosing the right compound bow sight and utilizing its features effectively, hunters can significantly enhance their shooting accuracy and increase their chances of a successful hunt. Whether you are a beginner or an experienced hunter, investing in a reliable compound bow sight is a wise decision that will improve your hunting experience.

Single Pin Adjustable Sights

When it comes to hunting with a compound bow, having a reliable sight is crucial for accurate shooting. One popular option for hunters is the single pin adjustable sight. Let’s explore the features and benefits of single pin adjustable sights and highlight some of the top models available for hunting enthusiasts.

Features and Benefits of Single Pin Adjustable Sights

Single pin adjustable sights offer several advantages for hunters. Here are some notable features and benefits:

1. Precision: Single pin adjustable sights allow for precise aiming by providing a clear and uncluttered view of your target. With just a single pin to focus on, it becomes easier to align your shot accurately.

2. Adjustable Yardage: One of the key benefits of single pin adjustable sights is the ability to adjust the yardage with ease. This feature allows hunters to adapt to different shooting distances quickly.

3. Improved Field of View: With a single pin sight, you can enjoy a wider field of view, making it easier to spot targets and assess your surroundings.

4. Light Gathering Properties: Many single pin adjustable sights come with fiber optic technology, which enhances light gathering capabilities. This feature ensures optimal visibility, even in low-light conditions.

Top Single Pin Adjustable Sights for Hunting

Here are some of the top single pin adjustable sights for hunting in 2023:

  1. Trophy Ridge React One Pro: This sight offers tool-less micro-adjustable windage and elevation, making it easy to fine-tune your shot. It also features Trophy Ridge’s React Technology, which automatically adjusts the pin based on the distance.
  2. Spot Hogg Tommy Hogg: The Tommy Hogg sight is known for its durability and precision. It has a micro-adjustable 2nd and 3rd axis and an adjustable yardage knob for quick and precise adjustments.
  3. Black Gold Ascent Verdict: This sight boasts a unique SkyCoil system that gathers light from the sky, maximizing brightness in any lighting condition. It also offers micro-adjustable windage and elevation and a quick-trigger release.
  4. HHA Sports Optimizer King Pin: This sight features HHA’s patented R.D.S. (Range Dial Shoot) Technology, allowing for rapid and precise range adjustment. It also has a solid aluminum construction for durability.
  5. Trophy Ridge Fix Series: The Fix Series sights offer micro-adjustable windage and elevation and a rheostat light to improve visibility. They are available in multiple pin options to cater to different shooting styles.

These are just a few examples of the top single pin adjustable sights available for hunting. When choosing a sight, consider your budget, shooting preferences, and the specific features that matter most to you. Remember, a reliable sight can significantly enhance your hunting experience and improve your accuracy in the field.

Multi-Pin Fixed Sights

Features and Benefits of Multi-Pin Fixed Sights

When it comes to hunting with a compound bow, having the right sight can make all the difference in your accuracy and success. One popular type of sight commonly used by hunters is the multi-pin fixed sight. These sights come with multiple pins set at different yardage distances, allowing for quick and easy adjustments while out in the field.

One key benefit of multi-pin fixed sights is their versatility. With multiple pins, you can accurately aim at targets at different distances without needing to adjust your sights constantly. This makes them ideal for hunting situations where you may encounter game at varying ranges. The pins are typically bright and visible, making it easier to acquire your target and make precise shots.

Another advantage of multi-pin fixed sights is their simplicity. Once you have set the pins to the desired distances, you can trust that they will remain accurate throughout your hunting trip. There is no need for adjustments in the heat of the moment, allowing you to focus on the target and make a clean shot.

Top Multi-Pin Fixed Sights for Hunting

Here are some of the top multi-pin fixed sights for hunting that you should consider:

  1. Trophy Ridge React Pro: This sight features React Technology, which automatically adjusts the pins based on your bow’s speed. It has fiber optic pins and a bright aiming ring for improved visibility.
  2. Truglo Carbon XS Xtreme: This sight is lightweight and durable, with high-visibility pins and an adjustable brightness rheostat. It also has a glow-in-the-dark shooter’s ring for enhanced accuracy in low-light conditions.
  3. Spot Hogg Tommy Hogg: Known for its precision, this sight has micro-adjustable pins and a micro-adjustable 2nd and 3rd axis. It also offers quick and easy yardage adjustments.
  4. Trophy Ridge React Trio: This sight combines fixed pins and a movable sight for added versatility. The React Technology adjusts two pins automatically, while offering a third adjustable pin for longer shots.
  5. Apex Gear Covert Pro: This sight has a rear-facing yardage display and micro-adjustable windage and elevation. It also offers tool-less adjustments for convenience in the field.

These are just a few examples of the top multi-pin fixed sights available for hunting. Each sight has its own unique features and benefits, so it’s important to choose one that suits your personal preferences and hunting style.

In conclusion, multi-pin fixed sights are a popular choice among hunters due to their versatility and simplicity. They offer quick and accurate target acquisition at varying distances, allowing for more successful hunts. When choosing a sight, consider factors such as brightness, adjustability, and durability to find the best one for your needs.

Pendulum Sights

Compound bow sights are essential accessories for hunters, as they help improve accuracy and aim. One popular type of bow sight is the pendulum sight, designed specifically for angled shots in hunting situations. These sights are perfect for tree stand hunting, where the shooter is positioned above the target and needs to compensate for the downward shot. In this section, we will explore the features and benefits of pendulum sights and highlight some top options for hunting enthusiasts.

Features and Benefits of Pendulum Sights

Pendulum sights are designed to automatically compensate for the angle of the shot, ensuring accurate aim and increased hunting success. Here are some key features and benefits of pendulum sights:

  1. Vertical adjustments: Pendulum sights allow for vertical adjustments to align the pin with the target, taking into account the shooter’s elevation above the target.
  2. Pendulum mechanism: The pendulum mechanism in these sights compensates for the angle of the shot, allowing the pin to swing freely and stay on target.
  3. Increased accuracy: With a pendulum sight, hunters can effectively shoot at targets from elevated positions without worrying about aiming compensation.
  4. Easy to use: Pendulum sights are easy to mount and adjust, making them suitable for both novice and experienced hunters.

Top Pendulum Sights for Hunting

Here are some top pendulum sights recommended for hunting:

  1. Trophy Ridge React One Pro: This sight offers advanced features like tool-less micro-click windage and elevation adjustment, along with an adjustable rheostat light for better visibility in low-light conditions.
  2. TruGlo Pendulum: The TruGlo Pendulum sight features a precision pendulum design, smooth adjustment, and durable construction, making it a reliable choice for hunters.
  3. HHA Optimizer Lite: This pendulum sight comes with an exclusive mechanical rheostat feature that adjusts pin brightness based on lighting conditions, ensuring optimal visibility.
  4. Apex Gear Covert Pro: The Apex Gear Covert Pro sight offers precise windage and elevation adjustments, a glow-in-the-dark shooter’s ring for quick target acquisition, and a detachable bracket for easy installation.

In summary, pendulum sights are excellent options for hunters looking to improve accuracy when shooting from elevated positions. With their unique features and benefits, these sights provide reliable aiming compensation for angled shots. Consider the top pendulum sights mentioned above to enhance your hunting experience.

Retina Lock Sights

When it comes to hunting with a compound bow, having accurate and consistent shots is crucial. One accessory that can greatly improve your aim is a compound bow sight. Among the different types available, one popular option is the Retina Lock sight. In this blog section, we’ll discuss the features and benefits of Retina Lock sights and recommend some top choices for hunting enthusiasts.

Features and Benefits of Retina Lock Sights

Retina Lock sights utilize a unique technology that helps archers consistently position their eye in the same spot. This technology is meant to minimize torque and provide a more accurate aim. Here are some key features and benefits of Retina Lock sights:

  1. Consistent Anchoring: The Retina Lock sight has a built-in reference point that assists archers in achieving a consistent anchor point. This enhances shot accuracy and repeatability.
  2. Torque Reduction: By helping archers improve their form and reduce torque, Retina Lock sights can lead to more consistent shots and tighter groupings.
  3. Alignment Aid: The Retina Lock technology visually guides archers to ensure their form and anchor point are correct, resulting in improved shot alignment.
  4. Increased Confidence: With the assurance of consistent form and reduced torque, archers using Retina Lock sights can shoot with more confidence and trust in their equipment.

Top Retina Lock Sights for Hunting

Here are some top Retina Lock sights that are highly regarded by hunting enthusiasts:

  1. Trophy Ridge React Pro: This sight features a unique ballistix copolymer system for lightweight yet durable construction. It offers tool-less micro-adjustability and has a bright fiber optic ring for easy target acquisition.
  2. IQ Define Pro: This sight combines Retina Lock technology with micro-adjustable pins for precise aiming. It has a built-in sight level and boasts tool-less locking knobs for easy adjustments.
  3. Trophy Ridge Volt 5: Designed for entry-level archers, this sight offers Retina Lock technology at an affordable price. It has five ultra-bright fiber optic pins and a rheostat light for low-light conditions.
  4. BlackGold Pure Grip: This sight features a micro-groove pin technology that improves target clarity. It offers Retina Lock technology and micro-adjustments for enhanced accuracy.

No matter which Retina Lock sight you choose, it’s important to practice and familiarize yourself with its features before heading out for a hunt. Remember to adjust and fine-tune your sight based on your shooting preferences and target distance.

In conclusion, Retina Lock sights are a valuable accessory for archers who want to improve their accuracy and consistency while hunting with a compound bow. The advanced technology and visual aids provided by these sights can greatly enhance your shooting performance in the field. This sight here is an excellent choice for hunting.

Pendulum Bow Sights

Pendulum site by TruGlo

 Archery is one of the oldest forms of trajectory ranged weapons, next to slings and spears. Unlike its companions, archery has continued to evolve over the years and has become a mix of technology, science and precision gear that bears little resemblance to its ancestors.
A major area of growth in archery is in the sights that we use to place our arrows on target. This article focuses on a particular sight designed to be used from a tree stand, The Pendulum bow sight. The Pendulum bow sight is designed to compensate for shooting in environments that involve major changes in elevation.
Examples of this would be hunting from a tree stand or shooting up from the bottom of a ravine. The puzzle of elevated shots lies in the science of gravity and angles. A shot with flat trajectory flies parallel to the earth, and thus, receives a consistent pull from gravitational forces along its entire trajectory.
An elevated shot however, receives much less influence from gravity when shooting down, and much higher influence from gravity when shooting up. Changes in elevation also affect the actual distance the arrow flies to hit a target, since we are now dealing with horizontal distance, as well as vertical distance.
Hitting a target with altered gravitation pull and distance has required much skill and guess work in the past. Pendulum bow sights compensate for both by the nature of their design and allow elevated shots to be placed, on target, with ease.
Pendulum Bow sights accomplish their niche application by self-adjusting a single, swiveling pendulum, with the assistance of gravity itself. Thus, if you raise the bow on the vertical plane, the sight automatically adjusts, increasing the range of the contact point, compensating for the increase in gravity. When the bow is lowered on the vertical plane, the sight adjusts to decrease the distance to avoid overshot, due to lower gravitational interference.
Most archers agree, that within 35 yards, a pendulum bow sight will bulls-eye your target, with no guess work. Due to advancements in archery, most bows shoot relatively flat at 30-40 yards. This has eliminated one of the puzzles that pendulum bow sights were created to solve.
Most compound bow sights are, as a result, capable of making accurate shots from elevated positions. The pendulum sight, however, still tackles the elusive elevated distance challenge that others sights neglect. While pendulum sights are less popular than they were back in the 90’s, they are still sought out by archers who intend on making accurate, elevated shots.
Pendulum sights, when used on level terrain, are inferior to other compound bow sights that are created for this environment. Pendulum sights can offer a flat trajectory sight by disabling the swiveling mechanism, if you ever find yourself with the need to do so. Most archers prefer to mount the type of sight that aligns with the terrain on which they hunt.
According to polls on public forums, the most popular pendulum compound bow sights are manufactured by Keller and TruGlo. Some archers preferring Keller’s sights for their robust build, choice materials and sleek finish. Others, however, prefer TruGlo for the quality of the sights themselves and the benefits that the fiber optics offer in low light situations.
The pendulum sight is a valuable asset for archers who are dealing with major changes in elevation. While this sight may not be the best option in every scenario, it offers superior accuracy in a niche market and should be considered, when the environment matches the need.
For more information on shooting a bow from a tree stand, you can check this article out here.