For archers looking to improve their accuracy and precision, using an archery sight tape can make a world of difference. Whether you are a beginner or a seasoned pro, having the right sight tape can greatly enhance your shooting experience and help you hit your target with greater consistency.
Overview of archery sight tape and its importance
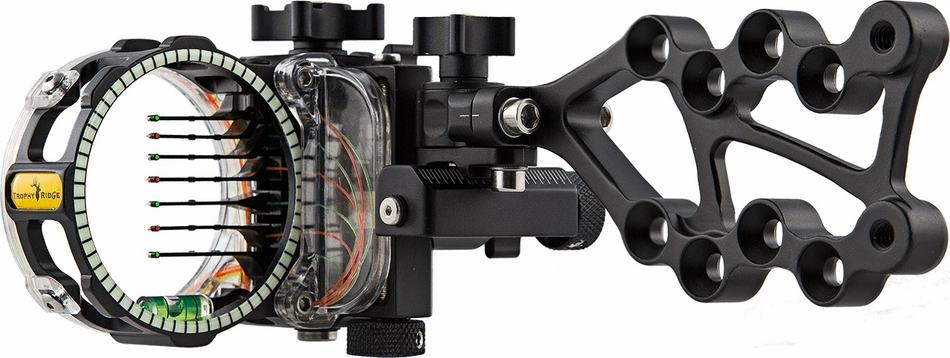
An archery sight tape is a thin adhesive strip that is applied to the sight housing of your bow. It is specifically designed to help you make accurate adjustments to your sight pins, allowing you to compensate for distance and windage variations.
Moreover, by using the sight tape, you can easily determine the correct pin setting for each shot, taking into account the specific range and environmental factors. Using an archery sight tape is crucial for achieving consistent shots and maximizing your accuracy.
Without it, you would need to rely on guesswork or trial and error to make adjustments, which can be time-consuming and frustrating. Furthermore, the sight tape takes the guesswork out of the equation, allowing you to quickly and confidently adjust your sight for different distances.
Benefits of using archery sight tape for accuracy
Using an archery sight tape offers several key benefits for improving accuracy:
- Precise adjustments: The sight tape provides a precise and systematic way to adjust your sight pins, ensuring consistent and accurate shots.
- Timesaving: With the sight tape, you can quickly determine the correct pin setting for each distance, saving time and effort during practice sessions or competitions.
- Increased confidence: Knowing that your sight is properly calibrated gives you the confidence to focus on your shot execution, leading to improved performance.
- Enhanced consistency: By using the sight tape, you eliminate guesswork and ensure that your sight adjustments remain consistent and repeatable shot after shot.
In conclusion, using an archery sight tape is a valuable tool for any archer looking to improve their accuracy and consistency. It provides a systematic approach to sight adjustments and offers several benefits that can greatly enhance your shooting experience.
Understanding Sight Tapes
Sight tapes are markings or measurements on the sight housing that indicate different distances, helping you adjust your aim accordingly. Here’s a breakdown of how to make the most of this valuable tool.
Explanation of sight tape markings and measurements
Sight tapes typically include markings or numbers that correspond to yardage or distance. These tapes are attached to the sight housing and provide a reference point for aiming at different ranges.
The measurements may be in yards, meters, or a combination of both, depending on your preference. It’s essential to familiarize yourself with the markings and understand how they correlate to specific distances.
How to read and interpret sight tape scales accurately
Reading and interpreting sight tape scales accurately is crucial for precise aiming. Start by zeroing in your sight at a known distance, such as 20 yards. Then, shoot arrows at various distances while adjusting the sight accordingly.
Take note of the sight tape marking corresponding to each distance to create your own customized sight tape scale. In addition, some archers prefer a logarithmic scale, where the tape is spaced closer together for shorter distances and gradually widens for longer ranges.
Regular practice and fine-tuning are essential to ensure optimal accuracy. Furthermore, experimenting with different sight tape styles and adjusting according to individual shooting preferences can improve consistency and help you hit your target even at varying distances.
Mastering the use of sight tapes takes time and practice. Start by creating a sight tape customized to your shooting style and gradually refine it for optimal performance. With patience and dedication, you’ll enhance your archery skills and consistently hit your mark.
Step-by-Step Guide to Applying Sight Tape
Determining your bow’s specific sight tape requirements
Before applying sight tape to your archery sight, it is crucial to determine your bow’s specific requirements. Here’s how you can do it:
- Measure your arrow speed: Use a chronograph or consult your bow’s manufacturer to determine the speed at which your arrows travel. This information will help you select the appropriate sight tape.
- Calculate your sight marks: Additionally, based on your arrow speed and the distance you want your sight marks to cover, use a sight tape calculator to determine the corresponding yardage measurements for each mark.
Preparing the sight and applying the tape correctly
Now that you have determined the sight tape requirements, it’s time to prepare your bow sight and apply the tape accurately. Follow these steps:
- Clean the sight surface: Use a mild cleaner or rubbing alcohol to thoroughly clean the sight surface. This will ensure proper adhesion of the tape.
- Cut the tape: Cut the sight tape into the appropriate size for your sight’s dial or wheel. Make sure to use a sharp knife or scissors for clean, precise cuts.
- Apply the tape: Begin applying the tape from the starting point on the sight dial or wheel, aligning it carefully according to the yardage measurements. Press the tape firmly to ensure it sticks well.
- Smooth out any air bubbles: To ensure smooth, accurate operation, gently press and smooth out any air bubbles that may have formed under the tape.
By following these step-by-step instructions, you can effectively apply sight tape to your archery sight, allowing for more precise aiming and consistent shooting accuracy.
Fine-Tuning Your Archery Sight Tape
For archers looking to take their shooting accuracy to the next level, using an archery sight tape can greatly enhance their performance. Moreover, with a few simple adjustments and testing, archers can fine-tune their sight tape to achieve optimal shooting results.
Adjusting sight tape settings for elevation and windage
- Elevation adjustment: Start by loosening the sight tape adjustment screws and align the pointer with the desired yardage. Tighten the screws to secure the setting. Repeat this process for each desired yardage.
- Windage adjustment: To make windage adjustments, locate the windage adjustment screws on your sight. Loosen the screws and move the sight housing left or right to make the necessary corrections. Secure the screws once the adjustment is made.
Testing and making necessary adjustments for optimal performance.
- Take test shots: Start by shooting at a known distance, such as 20 yards, and observe where the arrows hit in relation to the aiming point. Make note of any deviations.
- Make sight tape adjustments: Use the deviations observed in step 1 to determine if any adjustments are needed. Furthermore, if the arrows consistently hit above or below the aiming point, make small adjustments to the sight tape for elevation. Similarly, adjust for windage if the arrows consistently deviate to the left or right.
- Continue testing and fine-tuning: Repeat the test shots and adjustments until the arrows consistently hit the desired target. Take note of the final sight tape settings for future reference.
By following these steps, archers can effectively use their archery sight tape to fine-tune their shooting accuracy. Remember to consistently practice and monitor your sight tape settings for ongoing improvement.
Tips and Tricks for Using Archery Sight Tape
If you’re an archery enthusiast looking to improve your accuracy, using archery sight tape can be a game-changer. What’s more, these simple tools can help you adjust your sight pins for different distances, increasing your chances of hitting the target. To make the most out of archery sight tape, here are some tips and tricks to keep in mind.
Using additional tools or accessories to enhance accuracy.
- Bow Balancing: Making sure your bow is properly balanced can greatly affect your accuracy. Use a bow balance scale or similar tool to ensure the weight distribution is optimal.
- Stabilizers: Adding a stabilizer to your bow can help reduce vibration and improve stability. This can lead to more consistent shots and better overall accuracy.
- Release Aids: Additionally, using a release aid can provide a more consistent and controlled release of the arrow. This can help eliminate unnecessary movement and improve accuracy.
Common mistakes to avoid when using bow sight tape.
- Using Incorrect Measurements: One common mistake is using the wrong sight tape measurement. Make sure to select the appropriate tape for your specific sight and follow the manufacturer’s instructions for installation.
- Ignoring Environmental Factors: Wind speed, temperature, and lighting conditions can all affect your shot. Take these factors into account when using archery sight tape and make adjustments accordingly.
- Improper Sight Adjustment: It’s important to properly align your sight pins with the desired distance markers on the sight tape. Failing to do so can result in inaccurate shots.
By following these tips and avoiding common mistakes, you can make the most out of archery sight tape and improve your accuracy on the range or in the field. Check this out for tips on sighting in your bow.