Having a properly set compound bow sight can make a world of difference in accuracy and precision. Understanding how to set the first, second, and third axis on your bow sight is crucial in ensuring consistent and reliable shot placement.
Explanation of the different axes and their functions on a bow sight.
- First Axis: The first axis refers to the horizontal tilt of the bow sight. It determines whether the sight is properly aligned with the riser. To set the first axis, use a leveling tool to ensure that the sight housing is perfectly level. This adjustment is important for consistent left and right accuracy.
- Second Axis: The second axis refers to the vertical tilt of the bow sight. It controls the up and down trajectory of your arrows. To set the second axis, align the sight with a vertical reference point, such as a plumb line or a vertical target. Adjust the sight until the bubble level reads perfectly level. This will help you maintain consistent vertical accuracy.
- Third Axis: The third axis refers to the rotation of the bow sight around its vertical axis. It compensates for the effects of gravity on the trajectory of your arrows over longer distances. To set the third axis, aim the bow at a distant target and make slight left and right adjustments to ensure that the sight housing is perfectly aligned with the target.
Make small adjustments and recheck your levels after each adjustment. This will help you fine-tune your bow sight and ensure accurate shots. Furthermore, understanding and properly setting these axes will greatly improve your shooting accuracy and confidence on the field.
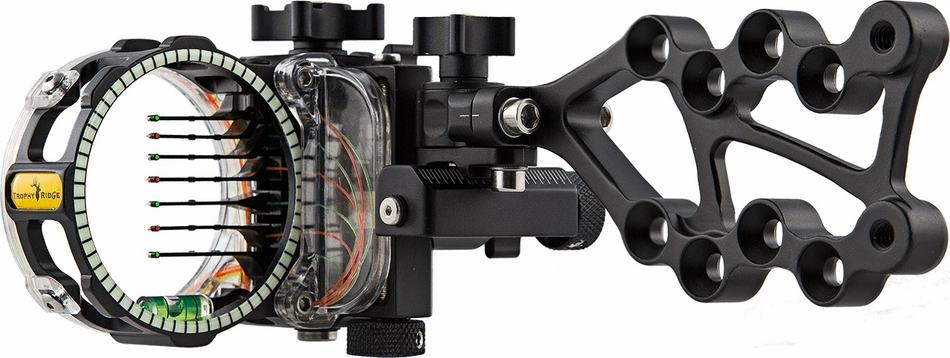
Setting the 1st, 2nd, and 3rd Axis on a Bow Sight.
Setting the 1st Axis on a Bow Sight
- Mount your bow sight: Begin by mounting your bow sight securely on your bow using the appropriate screws or attachments.
- Level your bow: Use a leveling device to ensure your bow is perfectly level. This step is essential as it serves as the foundation for setting the 1st axis.
- Mount a leveling device on your sight: Attach a leveling device to your sight bracket, aligning it vertically. This device will be used to set the 1st axis.
- Adjust the 1st axis: Gradually adjust the 1st axis of your sight until the leveling device indicates that it is perfectly level. Use the appropriate screws or knobs to make these adjustments.
- Double-check: After setting the 1st axis, recheck the overall levelness of your bow. If necessary, make any additional adjustments to ensure everything is perfectly aligned.
By properly setting the 1st axis on your bow sight, you can significantly enhance your shot accuracy. Consult your bow manufacturer’s guidelines for any specific instructions related to your equipment.
Setting the 2nd and 3rd axis on your bow sight are also important for achieving optimal accuracy, but they require additional steps and expertise. It’s recommended to consult a professional bow technician or refer to your bow sight’s user manual for detailed instructions on setting these axes.
Setting the 2nd Axis on a Bow Sight
- Start by loosening the screws that hold the sight housing to the bow. This will allow you to make adjustments to the 2nd axis.
- Find a level surface or use a leveling device on your bow. Align your bow vertically using the leveling tool.
- With the bow in a vertical position, look through the peep sight and align the sight housing with a horizontal reference point, such as a fence or tree line.
- While maintaining the vertical position of the bow, adjust the 2nd axis screw on your bow sight. Use a bubble level to ensure the sight housing is perfectly level.
- Once the sight housing is level, tighten the screws that hold it in place on your bow. Make sure to verify the alignment to ensure there hasn’t been any movement during the process of tightening.
Remember, it’s essential to recheck and make adjustments as needed to ensure accuracy. What’s more, having the 2nd axis properly set will help you shoot more accurately and consistently.
Setting the 3rd Axis on a Bow Sight
Techniques for setting the 3rd axis to achieve accurate shots on inclined and declined terrains:
- Level your bow: Start by leveling your bow vertically, ensuring that it is straight up and down. This will serve as a reference point for setting the 3rd axis.
- Mount your bow sight: Attach the bow sight to your bow securely and ensure it is level both horizontally and vertically.
- Find an incline or decline: Look for a location with a known incline or decline, such as a hill or staircase, where you can practice setting the 3rd axis.
- Adjust the 3rd axis: Using the knobs or screws provided on the bow sight, make small adjustments to the 3rd axis until the bubble is centered when you are aiming at the incline or decline.
- Test your shot: Take several practice shots on the incline or decline to ensure that your arrows are hitting the target accurately. Make further adjustments if needed.
By following these techniques, you can effectively set the 3rd axis on your bow sight and be confident in achieving accurate shots on inclined and declined terrains.
Fine-Tuning the Axes on a Bow Sight
Tips and tricks for fine-tuning the axes to achieve optimal accuracy for individual archers.
Fine-tuning the axes on a bow sight is an essential step in achieving optimal accuracy for individual archers. Moreover, by aligning the 1st, 2nd, and 3rd axes correctly, you can ensure that your shots are on target consistently. Here are some tips to help you fine-tune your bow sight axes:
- Align the 1st axis: The 1st axis of the bow sight determines the left and right accuracy. To set it correctly, make sure that the bubble level is centered within the sight housing. Adjust the horizontal alignment until the bubble remains centered when the bow is held in the shooting position.
- Adjust the 2nd axis: The 2nd axis controls the vertical alignment of your shots. Start by setting the bow sight at a distance of 20 yards and shoot a few arrows. If the arrows consistently hit either above or below the target, make adjustments to the 2nd axis until the shots are on target horizontally.
- Fine-tune the 3rd axis: The 3rd axis compensates for the bow’s natural cant or tilt. Shoot a few arrows on uneven ground and observe if the shots consistently drift left or right. Adjust the 3rd axis until the arrows are hitting the target accurately, regardless of the ground slope.
The process of fine-tuning the axes may require some trial and error. Take your time, be patient, and make small adjustments to achieve the desired accuracy. It’s also a good idea to consult with a professional archer or bow technician for expert guidance.
Troubleshooting Common Issues
Common problems encountered when setting the axes and how to fix them.
When it comes to setting the axes on a bow sight, it’s not uncommon to run into a few hiccups along the way. However, with some guidance, you can easily troubleshoot and overcome these challenges. Below are a few typical problems you might come across and the solutions to resolve them.
- Improper alignment: If your sight is not aligned properly, it can lead to inaccurate shots. To fix this, ensure that the sight housing is centered in relation to the bowstring and the riser. Adjust the sight’s windage and elevation knobs until the sight pin aligns with your target.
- Unstable sight picture: Sometimes, the sight picture may become shaky, making it difficult to aim consistently. This could be due to loose screws or faulty components. Tighten all screws on the sight to ensure stability. In addition, if the problem persists, inspect for any damaged or worn-out parts that may need replacement.
- Inconsistent arrow grouping: If your arrows are not grouping consistently, it could be a sign that your sight axis are not properly set. Ensure that the sight pins are aligned parallel to the bowstring and level with the arrow rest. Make adjustments to the sight’s second and third axis until your arrows consistently group together.
Remember, setting the axes on a bow sight requires patience and fine-tuning. Furthermore, don’t hesitate to seek guidance from experienced archers or consult the manufacturer’s instructions specific to your sight model. By addressing these common issues, you’ll be on your way to achieving more accurate and consistent shots.
Conclusion
Setting the 1st, 2nd, and 3rd axis on a bow sight is crucial for achieving improved shooting accuracy. By properly aligning these axes, archers can ensure that their sights are accurately calibrated and that their arrows will consistently hit the target.
Remember, it’s always recommended to consult the manufacturer’s instructions or seek the help of an experienced archer when setting the axes on a compound bow sight. Their expertise and guidance can help you achieve optimal accuracy in your shots.